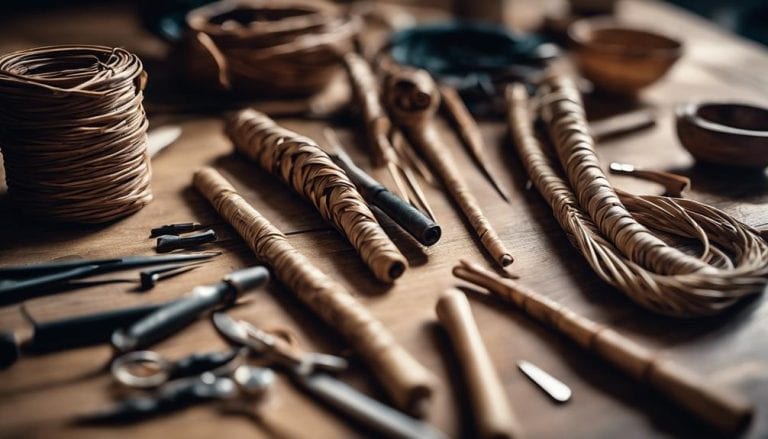
Essential Tools for Weaving Reeds
As we delve into the intricate art of weaving reeds, it becomes evident that each tool plays a unique role akin to a piece in a carefully orchestrated symphony. Every tool contributes to the harmonious creation of woven masterpieces, from the delicate dance of the heddles guiding warp threads to the rhythmic motion of shuttles carrying weft yarn.
But what about the less-heralded tools like the reed splitter, packing tool, or Sley hook? These unsung heroes quietly support the weaving process, waiting to be discovered and appreciated for their indispensable roles in this ancient craft.
Essential tools for weaving reeds include a weaving needle and a loom, which help create intricate patterns. These tools help craft beautiful and durable woven reed products precisely and easily.
Key Takeaways
- Needle size affects yarn tension and pattern intricacy
- Reed Splitter ensures even warp distribution and quality fabrics
- The Packing Tool maintains uniform warp tightness for neat weaves
- Shed Stick enhances yarn passage and weaving speed
Weaving Needle and Scissors
When I weave reeds, having a selection of weaving needles in various sizes and shapes, along with a sharp pair of scissors, is crucial for achieving precise and clean results. The needle size greatly influences the yarn tension; smaller needles work well for tighter and finer yarns, while larger needles are ideal for looser and thicker yarns. Ensuring the right needle size for the specific project is essential to maintain consistent tension throughout the weaving process.
Using sharp-pointed needles allows for intricate weaving patterns and detailed work, especially with delicate yarns. On the other hand, blunt-tipped needles work wonders with heavier yarns, providing durability and ease of handling. The scissors are vital in maintaining neat edges and precise yarn lengths. Keeping a dedicated pair for weaving helps in clean cuts, preventing fraying and ensuring a professional finish to the woven reeds.
Reed Splitter

A reed splitter proves indispensable for achieving precise and even distribution of warp threads when weaving.
Here are some essential techniques and maintenance practices for using a reed splitter:
- Techniques: When using a reed splitter, ensure that each warp thread is individually separated and spread within the reed. Gently guide the reed splitter through the warp threads, ensuring they are evenly distributed across the loom’s width.
- Troubleshooting: If you notice any warp threads getting stuck or tangled while using the reed splitter, stop immediately and carefully untangle them before continuing. This will help maintain an even distribution of the warp threads.
- Maintenance: After each use, clean the reed splitter thoroughly to remove any dust or debris that may have accumulated. Store it in a dry, safe place to prevent damage and ensure longevity.
- Best Practices: Regularly inspect the reed splitter for signs of wear or damage. Replace any worn parts to maintain its effectiveness in separating and spreading warp threads accurately. Following these maintenance practices will help you achieve consistent, high-quality woven fabrics.
Packing Tool

Craftsmanship and attention to detail are exemplified in the precision tool known as the packing tool, which is essential for ensuring the uniformity and tightness of warp threads in weaving projects. A weaving essential, the packing tool plays a crucial role in maintaining the consistency of warp threads, contributing to the overall quality of the woven fabric. To aid you in understanding the importance of this tool, I have compiled a table detailing packing tool maintenance, weaving techniques, tips for choosing the right packing tool, and troubleshooting suggestions:
| Packing Tool Tips | Description |
|---|---|
| Maintenance | Regularly clean the tool to prevent yarn snagging. |
| Weaving Techniques | Use the tool to push the weft yarn into place for even weave. |
| Choosing the Right Tool | Select a tool that fits comfortably in your hand. |
| Troubleshooting | If experiencing tension issues, adjust your technique. |
Shed Stick

With shed sticks being indispensable tools in weaving, their flat design is crucial in opening the shed created by the heddle for smooth yarn passage. When shedding stick techniques, mastering the art of manipulating the shed stick efficiently can significantly enhance weaving speed and precision. The materials used for shed sticks can vary, from traditional wood to modern lightweight metals, each offering unique benefits like durability or flexibility.
Shed stick maintenance is essential for longevity; keeping the stick clean and debris-free ensures seamless shedding during weaving. As for shed stick designs, the shape and size are crucial in determining how effectively the shed is opened and closed, impacting the overall weaving experience. Exploring different designs can lead to finding the perfect shed stick that complements your weaving style, allowing for a more fluid and enjoyable weaving journey.
Sley Hook

Efficiency and precision intertwine seamlessly when wielding a sley hook in weaving, guiding warp threads with finesse through the dents of a reed. A sley hook is a versatile tool crucial in maintaining warp tensioning and dent spacing while sleying the warp threads accurately. By carefully pulling each warp thread through the dents, this tool ensures that the threads are evenly spaced and under the correct tension, which is vital for achieving uniform weaving results.
The table below highlights the significance of a sley hook in the weaving process:
| Sley Hook Benefits | Description |
|---|---|
| Warp Tensioning | Ensures consistent tension on warp threads |
| Dent Spacing | It helps maintain proper spacing between threads |
The sley hook’s ability to uphold warp tension and dent spacing is pivotal for weavers seeking precision and reliability in their weaving projects. Mastering this tool can lead to liberation in creativity and craftsmanship, empowering weavers to produce high-quality woven pieces effortlessly.
Loom Bench

As a weaver immerses themselves in the intricate art of creating textiles, the foundation of their craft is often anchored by a sturdy and supportive Loom Bench.
Here are some key aspects to consider when choosing the perfect loom bench for your weaving journey:
- Bench height and comfort: A well-designed loom bench offers adjustable height settings, allowing you to customize it to your preferred working position. This feature ensures you maintain proper posture and comfort during long weaving sessions.
- Bench storage organization: Look for a loom bench with storage compartments or shelves to keep your weaving tools, yarn, and accessories organized and within reach. A tidy workspace enhances efficiency and contributes to a more enjoyable weaving experience.
Selecting a loom bench that prioritizes comfort, ergonomics, and organization can significantly elevate your weaving practice. It will enable you to focus on the creative process without distractions or discomfort.
Warping Board

Utilizing a warping board in weaving crafts enables me to meticulously measure and create warp threads for setting up the loom. This tool, typically a wooden frame with pegs, provides a structured approach to organizing and measuring warp threads before transferring them to the loom. When using the warp board, I follow specific techniques to ensure the warp lengths are consistent and accurate, laying the foundation for a successful weaving project.
Incorporating warp board techniques is crucial for avoiding potential issues during the warping process. Troubleshooting any irregularities in the warp threads early on can prevent complications while weaving. Additionally, proper maintenance and storage of the warp board are essential for preserving its functionality.
Keeping the board clean and storing it in a dry environment away from direct sunlight can extend its lifespan and ensure its effectiveness for future projects. By mastering warp board techniques and following maintenance and storage tips, I can enhance my weaving experience and create intricate and beautiful woven pieces with precision and ease.
Frequently Asked Questions
What Equipment Do You Need for Weaving?
I need essential tools like a loom, shuttle, and yarn for weaving. These basics aid in creating intricate patterns and designs. By mastering basic techniques and exploring weaving patterns, I unleash my creativity and achieve liberation in my craft.
What Are Instruments Used for Weaving?
Instruments like looms, shuttles, and heddles are crucial for exploring diverse weaving techniques and patterns. Additionally, weaving materials and accessories are vital in enhancing creativity and achieving desired fabric textures.
What Are the Parts of a Weaving Reed?
The weaving reed parts include the frame for stability, dents for holding warp threads, and a crossbar for alignment. These reed components form the essential structure, ensuring precise spacing and tension for weaving intricate patterns.
What Is the Device Used in Weaving?
I weave with a loom, using various types for different techniques. The device I rely on? A weaving reed. It dictates thread spacing, ensuring tension and uniformity. Metal, plastic, or wood is my weaving ally.
Conclusion
Weaving reeds are like conducting a symphony, with each tool vital in creating a harmonious masterpiece. Every instrument contributes to the final tapestry, from the precision of the heddles to the smooth glide of the shuttles. Just as a conductor guides the orchestra, these essential tools guide the weaver toward a successful and fulfilling weaving experience. Embrace the tools, embrace the process, and watch your creativity unfold like a beautifully orchestrated symphony.